
As a Keurig coffee machine user, it’s not uncommon to face the annoying problem where the descale light remains on even after you’ve finished descaling. So here’s what to do if the Keurig descale light won’t turn off.
If the Keurig descale light won’t turn off, try running multiple cycles of the descaling cycle and rinse everything thoroughly. Reset the machine by unplugging it, leaving it unplugged for 5 minutes, and then plugging back in. Regular descaling helps maintain the machine’s performance.
In the following sections, we dive deeper into the intricacies of your Keurig machine.
You’ll learn not just about the descaling process but also about preventive measures to avoid future issues. We cover alternative descaling solutions, step-by-step guides for resetting your Keurig, and tips for regular maintenance. Additionally, we address common queries in our FAQ section, providing you with comprehensive knowledge to keep your Keurig in top condition.
Whether you’re a coffee aficionado or just need your daily caffeine fix, this guide ensures your Keurig is always ready to brew the perfect cup.

Key Takeaways:
- Keurig descale light that won’t turn off can be frustrating, but it’s a common issue that can be fixed.
- Ignoring the descale light can lead to performance issues with your Keurig coffee maker.
- There are quick and easy fixes that can help you resolve the issue, such as manually resetting the descale light and using descaling solutions.
- Regular descaling and proper maintenance practices can prevent future descale light problems.
- If all else fails, don’t hesitate to contact Keurig customer support for assistance.
Understanding The Keurig Descale Light
The Keurig descale light is an important indicator that alerts you to the need for descaling your coffee maker. Descaling is the process of removing mineral deposits that accumulate over time, which can affect the performance and lifespan of your Keurig machine. It is crucial to pay attention to the descale light and ensure that it is functioning properly to maintain the optimal functioning of your coffee maker.
Why Is The Keurig Descale Light Important?
The descale light on a Keurig coffee maker serves as a reminder that a descaling cycle is necessary. It indicates that the machine has detected a buildup of mineral deposits in its internal components, such as the heating element and water lines. Ignoring the descale light can lead to issues with your coffee maker’s performance, including slower brewing times, compromised taste, and clogging.
What Does The Descale Light Indicate?
The illuminated descale light signifies that your Keurig coffee maker requires descaling. It alerts you to the presence of mineral deposits that can impede the flow of water and affect the machine’s performance. Descaling removes these deposits, allowing your coffee maker to function efficiently and prolonging its lifespan.
Common Reasons Why The Keurig Descale Light Won’t Turn Off
There can be several reasons why the Keurig descale light won’t turn off even after you’ve descaled your coffee maker. Some common culprits include:
- Incomplete descaling procedure: If you did not follow the descaling instructions thoroughly, the descale light may persist.
- Faulty sensors: The sensors that detect mineral buildup may be malfunctioning, causing the descale light to stay on.
- Mineral buildup: In some cases, the descaling process may not completely remove all mineral deposits, resulting in the descale light remaining illuminated.
Understanding these common reasons will help you troubleshoot the issue and identify the cause of the persistent descale light, allowing you to implement the appropriate solution.
Common Reasons for Keurig Descale Light Won’t Turn Off
| Reasons | Possible Solutions |
|---|---|
| Incomplete descaling procedure | Repeat the descaling process, following the instructions carefully |
| Faulty sensors | Contact Keurig customer support for assistance |
| Mineral buildup | Perform additional descaling cycles or use alternative descaling solutions |
How to Fix a Keurig Descale Light that Won’t Turn Off After Descaling
If your Keurig descale light continues to illuminate even after completing the descaling process, there’s no need to worry. In this section, we will provide you with step-by-step instructions to fix the issue. We will also explore additional solutions that you can try if the descale light persists, ensuring you can troubleshoot and resolve the problem effectively.
Other Solutions to a Keurig Descale Light that Stays On After Descaling
In addition to the standard descaling process, there are other solutions you can attempt to resolve the issue with the Keurig descale light. These alternative methods can be effective in cases where the light remains illuminated even after descaling your coffee maker.
Resetting the Machine: One solution you can try is resetting your Keurig machine. To reset it, follow these steps:
- Turn off and unplug your Keurig coffee maker.
- Wait for a few minutes, then plug it back in.
- Turn on your Keurig and check if the descale light has turned off.
Cleaning the Water Reservoir: Another potential solution is to clean the water reservoir. Sometimes, mineral buildup in the reservoir can cause the descale light to stay on. To clean the reservoir, follow these steps:
- Remove the water reservoir from your Keurig machine.
- Empty any remaining water and rinse the reservoir with warm water.
- Use a mild detergent and a soft brush to scrub the reservoir, ensuring you remove any mineral deposits.
- Rinse the reservoir thoroughly and dry it before placing it back into your Keurig.
Running Additional Water-only Brew Cycles: If the descale light persists, you can try running additional water-only brew cycles. This process can help flush out any remaining mineral deposits. To do this:
- Fill the water reservoir with fresh water.
- Place a mug on the drip tray, ensuring it’s empty.
- Run multiple brew cycles without a K-Cup, allowing only water to flow through the machine.
- Continue running brew cycles until the reservoir is empty.
By following these steps and trying these alternative solutions, you can effectively address a Keurig descale light that won’t turn off after descaling your coffee maker. Remember to refer to the user manual for your specific Keurig model for additional troubleshooting tips and instructions.
Steps To Manually Reset The Keurig Descale Light
Manually resetting the Keurig descale light can often resolve the problem of it staying on. Follow these step-by-step instructions to reset the descale light and resume normal operation. Please note that these steps may vary slightly depending on the model of your Keurig coffee maker, but the principles remain the same.
Step 1: Power Off And Unplug Your Keurig
The first step in manually resetting the Keurig descale light is to power off and unplug the machine. This ensures your safety and allows the coffee maker to reset its internal systems. Make sure to locate the power button on your Keurig and switch it off. Then, unplug the machine from the power source.
Step 2: Remove And Clean The Water Reservoir
The second step involves removing and cleaning the water reservoir of your Keurig coffee maker. This step is crucial for ensuring that there is no mineral buildup or debris that may be causing the descale light to stay on. To do this, carefully detach the water reservoir from the machine and clean it thoroughly. Use mild dish soap and a non-abrasive sponge to remove any residue or impurities. Rinse the reservoir with clean water and dry it completely before reattaching it to your Keurig.
Step 3: Run A Water-only Brew Cycle
Running a water-only brew cycle is an important step to help reset the Keurig descale light. Fill the water reservoir with clean water and place an empty cup or mug on the drip tray. Start a brew cycle without inserting a K-cup. This process will flush out any remaining mineral deposits or impurities from the internal components of your Keurig coffee maker.
Step 4: Perform A Vinegar Rinse
Performing a vinegar rinse is another useful step to manually reset the Keurig descale light. Mix equal parts of white vinegar and water in the water reservoir, ensuring that it is filled to the maximum capacity line. Place an empty cup or mug on the drip tray and initiate a brew cycle. Allow the vinegar solution to run through the machine completely. This process helps dissolve mineral buildup and ensures the internal components are thoroughly cleaned.
Step 5: Run Additional Water-only Brew Cycles
After performing a vinegar rinse, running additional water-only brew cycles can help eliminate any residue and complete the manual reset process. Fill the water reservoir with clean water and continue running brew cycles without inserting a K-cup. Repeat this step as necessary until the water runs clear and there are no signs of vinegar or mineral deposits in the brewed water.

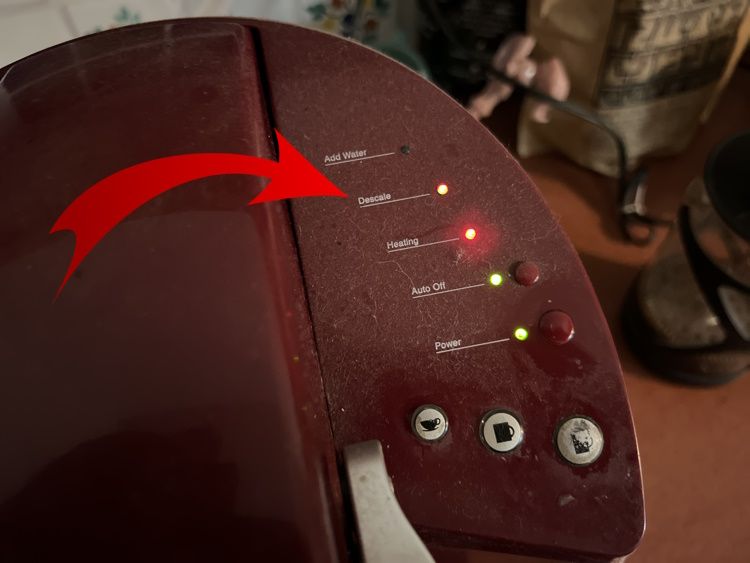
Please note: The image above is for visual reference only and may not depict the exact model or steps mentioned in this section.
Using Keurig Descaling Solution Or Alternative Methods
When it comes to descaling your Keurig coffee maker and resolving descale light issues, you have several options. In this section, we will explore the use of Keurig descaling solution, as well as alternative methods such as white vinegar and water mixture, and citric acid solution.
Option 1: Using Keurig Descaling Solution
Keurig descaling solution is a commercially available product specifically designed to clean and descale Keurig coffee makers. This descaling solution is formulated to effectively remove mineral deposits and ensure optimal performance of your Keurig machine.
Instructions:
- Start by emptying your Keurig water reservoir and removing any remaining water.
- Pour the Keurig descaling solution into the water reservoir as per the instructions on the product packaging.
- Place a clean, empty container under the brew head (where the K-Cup is inserted).
- Start the brew cycle and allow the descaling solution to flow through the machine.
- Repeat the process with fresh water to rinse out any remaining descaling solution.
- Dispose of the rinsed water and refill the reservoir with clean water.
- Run multiple brew cycles with just water to ensure all traces of the descaling solution are removed.
This method ensures thorough descaling of your Keurig coffee maker, helping to resolve the descale light issue.
Option 2: Using White Vinegar And Water Mixture
If you prefer an alternative method, you can use a white vinegar and water mixture to descale your Keurig machine. This method is cost-effective and uses common household ingredients.
Instructions:
- Start by emptying the water reservoir and removing any remaining water.
- Mix equal parts white vinegar and water in a container.
- Pour the vinegar mixture into the water reservoir.
- Place a clean, empty container under the brew head.
- Start the brew cycle and let the vinegar mixture flow through the machine.
- Repeat the process with fresh water to rinse out any vinegar residue.
- Dispose of the rinsed water and refill the reservoir with clean water.
- Run multiple brew cycles with just water to ensure all traces of vinegar are removed.
This method effectively descales your Keurig coffee maker and helps alleviate the descale light issue.
Option 3: Using Citric Acid Solution
Another effective alternative for descaling your Keurig machine is using a citric acid solution. Citric acid is a natural descaling agent that can effectively remove mineral deposits.
Instructions:
- Empty the water reservoir and remove any remaining water.
- Mix one tablespoon of citric acid powder with one cup of water in a container.
- Pour the citric acid solution into the water reservoir.
- Place a clean, empty container under the brew head.
- Start the brew cycle and allow the citric acid solution to flow through the machine.
- Repeat the process with fresh water to rinse out any citric acid residue.
- Dispose of the rinsed water and refill the reservoir with clean water.
- Run multiple brew cycles with just water to ensure all traces of citric acid are removed.
Using a citric acid solution offers an effective descaling method and can help resolve descale light issues in your Keurig coffee maker.
By following any of these descaling methods, you can effectively address the descale light issue and keep your Keurig coffee maker in optimal condition.
Troubleshooting Other Possible Issues With Your Keurig Descale Light
In addition to mineral buildup causing the descale light to stay on, there may be other potential issues to address. This section will guide you through troubleshooting two common culprits: checking for mineral buildup in the water lines and cleaning the Keurig exit needle.
Checking For Mineral Buildup In The Water Lines
To ensure proper water flow and prevent descale light problems, it is essential to check for mineral buildup in the water lines of your Keurig machine. Here’s how you can troubleshoot this issue:
- Power off and unplug your Keurig.
- Remove the water reservoir and empty any remaining water.
- Inspect the water lines inside the machine for any signs of mineral buildup, such as white or brown residue.
- If you see mineral deposits, use a soft brush or cloth to gently scrub the lines and remove the buildup.
- After cleaning, rinse the lines thoroughly with water to remove any loosened debris.
- Reassemble the water reservoir and power on your Keurig.
- Check if the descale light has turned off. If not, proceed to the next troubleshooting step.
Cleaning The Keurig Exit Needle
A clogged or dirty exit needle is another common cause of the descale light staying illuminated. To resolve this issue, follow these steps to clean the Keurig exit needle:
- Power off and unplug your Keurig.
- Remove the water reservoir and empty any remaining water.
- Locate the exit needle, which is the metal pin or puncture needle located at the bottom of the K-Cup holder.
- Using a paperclip or a similar tool, carefully insert it into the needle and gently move it in and out to dislodge any debris or coffee grounds that may be clogging the needle.
- You can also use a soft brush or cloth to clean the needle by gently brushing away any buildup.
- Rinse the needle with water to ensure it is thoroughly cleaned.
- Reassemble the water reservoir and power on your Keurig.
- Check if the descale light has turned off. If not, you may need to consider other troubleshooting methods or contact Keurig customer support.
By troubleshooting these two potential issues, you can address mineral buildup in the water lines and a clogged exit needle, which may be causing your Keurig descale light to stay illuminated. Ensure that you follow the steps carefully and safely to improve the overall performance of your Keurig coffee maker.
Preventing Future Descale Light Issues
To ensure that you don’t encounter descale light issues in the future, it’s essential to implement preventive measures for your Keurig machine. By following these tips and suggestions, you can keep your coffee maker in optimal condition and avoid any recurring descale light problems.
- Regular Descaling: One of the most crucial steps in preventing descale light issues is to descale your Keurig machine regularly. Descaling helps remove mineral deposits that can clog the internal components and trigger the descale light. Refer to the manufacturer’s instructions or the user manual to determine the recommended descaling frequency for your specific model.
- Use Filtered Water: Using filtered water can help prevent mineral buildup in your Keurig machine, reducing the chances of the descale light coming on. Filtering your water will remove impurities and minerals that can accumulate over time and affect the performance of your coffee maker.
- Proper Maintenance: Taking care of your Keurig machine through regular maintenance is another key factor in preventing descale light issues. This includes cleaning the water reservoir, removing any coffee grounds or debris from the area, and regularly inspecting the brewer for any signs of buildup or blockages. Keeping your machine clean and well-maintained will help ensure smooth brewing and prevent descale light malfunctions.
To summarize, regular descaling, using filtered water, and proper maintenance are essential preventive measures to avoid encountering descale light issues in the future. By incorporating these practices into your Keurig coffee maker routine, you can enjoy uninterrupted brewing and a well-functioning machine.

Contacting Keurig Customer Support
If you have exhausted all the troubleshooting steps and the descale light issue persists, it may be necessary to seek assistance from Keurig’s customer support. There are certain situations when contacting customer support is recommended:
- If you have followed the manual instructions and the descale light remains on.
- If you have tried alternative solutions and the descale light still won’t turn off.
- If you are unsure about the next steps to take in resolving the descale light problem.
- If you encounter any other technical issues or concerns related to your Keurig coffee maker.
To contact Keurig customer support, you can choose from multiple support options:
- Phone: Call Keurig’s customer support hotline at 1-866-901-2739 to speak with a representative who can guide you through troubleshooting steps or provide further assistance.
- Email: Send an email to Keurig’s customer support team at support@keurig.com. Include a detailed description of the descale light issue you’re experiencing and any relevant information about your coffee maker.
- Live Chat: Visit Keurig’s official website and access their live chat feature. This allows you to communicate with a customer support representative in real-time to address your descale light problem.
When reaching out to Keurig customer support, be sure to provide accurate information about your coffee maker, such as the model number and any specific error codes or messages displayed. This will help the customer support team diagnose and assist you more effectively.
If your Keurig coffee maker is still under warranty, be prepared to provide proof of purchase and any applicable warranty details. This will ensure that you receive appropriate assistance and potential solutions.
Conclusion
In conclusion, dealing with a Keurig descale light that won’t turn off can be frustrating, but there are effective solutions available. This article has provided quick and easy fixes, step-by-step instructions, and preventive measures to help you tackle the descale light problem and continue enjoying your Keurig coffee maker.
From understanding the importance of the descale light to troubleshooting common issues, this guide has equipped you with the knowledge to address the problem head-on. By following the provided instructions and implementing preventive measures, you can maintain the optimal performance and longevity of your Keurig machine.
If you have tried all the troubleshooting steps and the descale light issue persists, don’t hesitate to reach out to Keurig’s customer support. They can provide further assistance and guidance to resolve the problem. Remember to use genuine Keurig descaling solutions or alternative descaling agents like white vinegar or citric acid solution for effective descaling.
Now that you have the tools and knowledge, you can confidently resolve a Keurig descale light that won’t turn off and continue enjoying delicious cups of coffee from your Keurig machine. Happy brewing!
Frequently Asked Questions
What causes the descale light to come on in a Keurig coffee maker?
The descale light in a Keurig coffee maker comes on to indicate a buildup of mineral deposits in the machine’s internal components. Over time, mineral deposits from the water you use can accumulate and affect the performance and lifespan of your Keurig. When the descale light illuminates, it serves as a reminder to descale your coffee maker and remove these deposits.
What is the best descale solution to use for my Keurig coffee maker?
The best descale solution to use for your Keurig coffee maker depends on your preference and availability. Keurig offers a descaling solution specifically designed for their machines, which is a convenient and effective option. However, you can also use white vinegar or a citric acid solution as alternatives. Both white vinegar and citric acid are natural descaling agents and can help remove mineral deposits from your Keurig.
How often should I descale my Keurig?
The frequency of descaling your Keurig coffee maker depends on several factors, including the quality of your water and how often you use your machine. As a general guideline, it is recommended to descale your Keurig every 3 to 6 months. However, if you notice a decrease in performance or if the descale light comes on, it is a good indication that descaling is needed. Regular descaling helps maintain the optimal performance and longevity of your Keurig.
What should I do if the descale light persists even after cleaning?
If the descale light continues to stay on even after performing the necessary cleaning steps, there are a few additional troubleshooting tips you can try. First, ensure that you have followed the descaling instructions correctly and completed all the steps. Double-check for any mineral buildup in the water lines or clogs in the exit needle and clean them if necessary. If the issue persists, it may be helpful to contact Keurig customer support for further assistance in resolving the descale light problem.
Click Here to learn more about me. Click Here to learn more about my site. Editorial Policies.
- 35 Amazing Summer Dinner Recipes to Enjoy All Season Long - May 17, 2026
- Savory French Dip Sliders Recipe - May 17, 2026
- Roasted Garlic and Herb Flatbread Recipe - May 17, 2026